

It gives you an auth_token that you must keep secret. This token gives ANYONE absolute access to your bot. So keep it safe.
That’s it. You can search for your bot now. Type your bot’s name in Telegram’s search and your bot should show up. Press on start and now you can send messages to the bot. But where will these messages go?
Second: Setup a server for your bot (no need to leave your browser)
- Go to https://glitch.com.
- Log in and make a new express project.
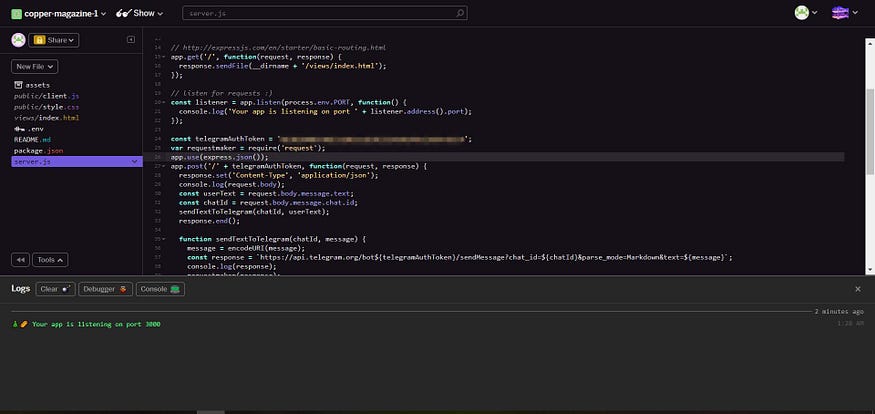
- When the editor opens up go to server.js. This file is responsible for handling all incoming messages.
- Append this code to the end of the file. (Will explain this code further below).
const telegramAuthToken = '<auth_token>';
var requestmaker = require('request');
app.use(express.json());
app.post('/' + telegramAuthToken, function(request, response) {
  response.set('Content-Type', 'application/json');
  console.log(request.body);
  const userText = request.body.message.text;
  const chatId = request.body.message.chat.id;
  sendTextToTelegram(chatId, userText);
  response.end();

  function sendTextToTelegram(chatId, message) {
    message = encodeURI(message);
    const response = `https://api.telegram.org/bot${telegramAuthToken}/sendMessage?chat_id=${chatId}&parse_mode=Markdown&text=${message}`;
    console.log(response);
    requestmaker(response);
  }
});
Make sure you replace <auth_token> with the one you received from BotFather. (Refer to the image above).
5. Now go to package.json and in your “dependencies” add this line.
"request": "^2.88.0"
It should look like this now.